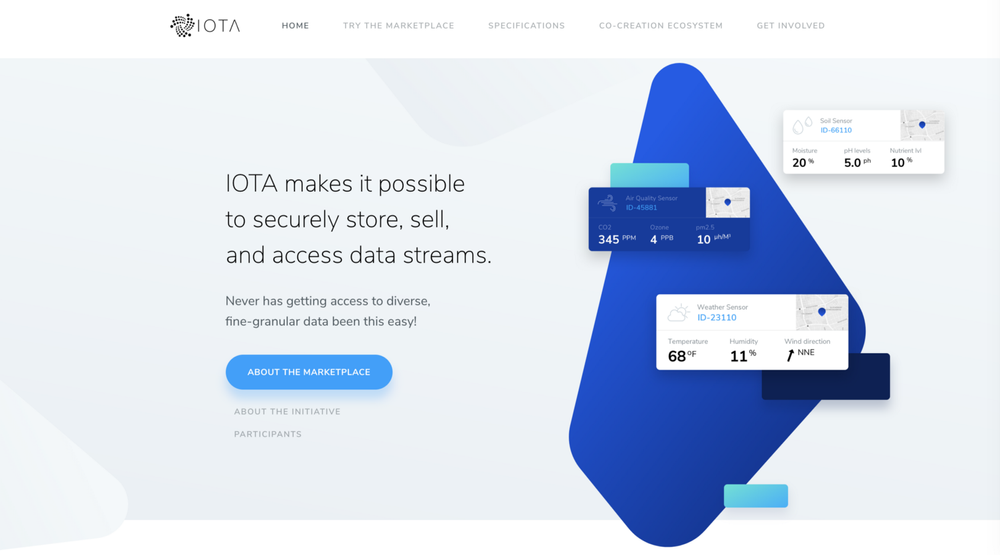
The IOTA Data Marketplace: a Technical Introduction
Part 4: Cloud Backend Configuration
In the previous article in this series, we talked about publishing sensor data. Today we will learn how to set up and configure a cloud backend to store settings and encryption keys, and also to manage login and purchase information.
To run the Data Marketplace, you’ll need to set up a cloud backend infrastructure.
We made it provider agnostic, so you can pick any of the providers on the market. At IOTA, we decided to use Google’s Firebase over Amazon AWS and Microsoft Azure as our cloud backend provider.
All three providers offer a similar set of services with similar capabilities.
Firebase is great for early-stage development and getting your product off the ground fast. It provides a cohesive set of services that are simple and easy to understand.
It is geared towards autoscaling, automatic traffic management, and low IT costs. Billing is usually simpler and consequently, google tends to be cheaper at scale as well, particularly if you are a small team putting together a fast product.
Microsoft Azure and Amazon AWS are supermarkets of your infrastructure needs. Unless you know the landscape of these tools, they’re overwhelming and not helpful.
AWS comes with a rich SDK with most features that you will need but calculating the total cost to run your solution is not going to be straightforward. Billing is (usually) complicated, some services have various tiers, different ways you can buy instances, etc. If not used properly, you can potentially incur a lot of costs.
In this article, I’ll explain in detail how to configure Google’s Firebase to run a Data Marketplace application. If you follow this tutorial, you’ll need only 10 minutes to have everything configured and ready to start.
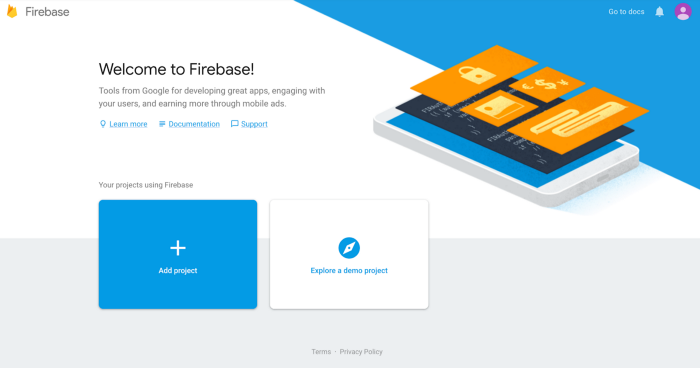
First, make sure you have a Google Account and can sign in on https://firebase.google.com
After you signed in, proceed to the page https://console.firebase.google.com Here you’ll see a list of your existing projects.
Initially, there are no projects to display, so let’s start with the first one. Click on the large blue area marked with “+ Add project”
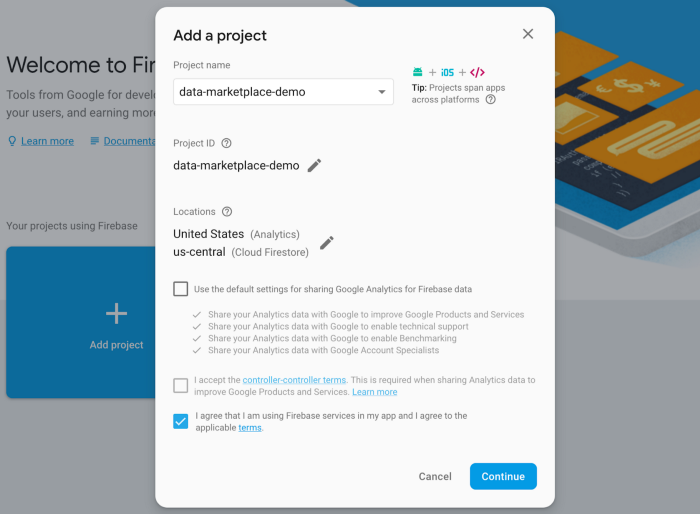
Specify a project name. It should be unique across all existing Firebase projects, so be creative! You can also select a preferred data center location, depending on where most of your users will come from.
You can unselect the analytics checkbox if you don’t expect to collect analytics data. Please note, if you leave it selected, you need to inform your users about the data being collected and how you expect to use it.
Make sure you read and agreed with the terms and conditions, then press “Continue”.
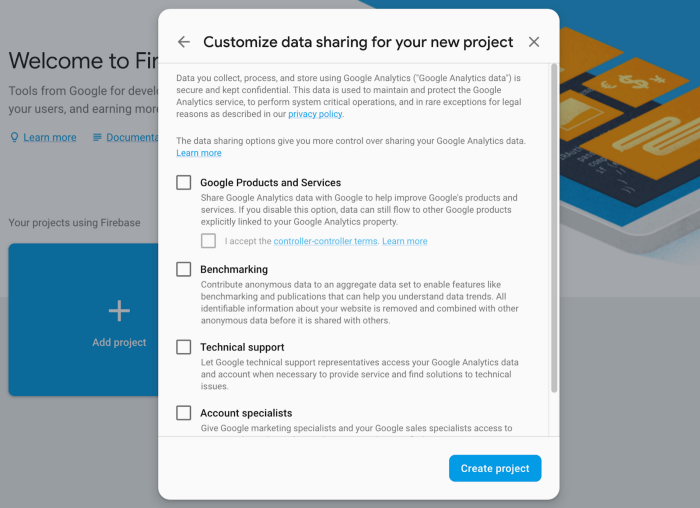
On the next screen, you can specify data sharing options or just skip it by pressing “Create project”.
It will take several seconds until your project is ready.
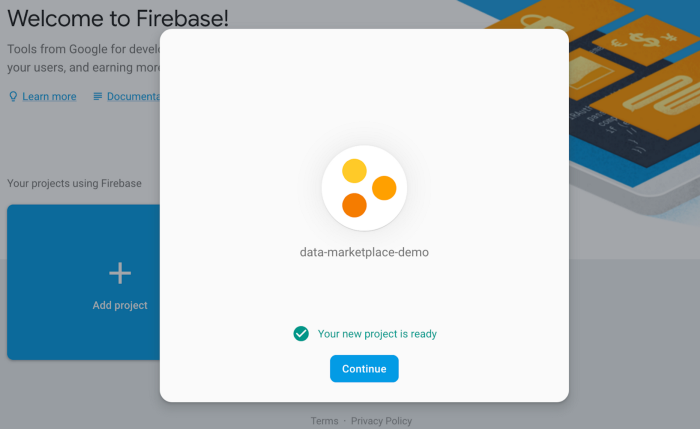
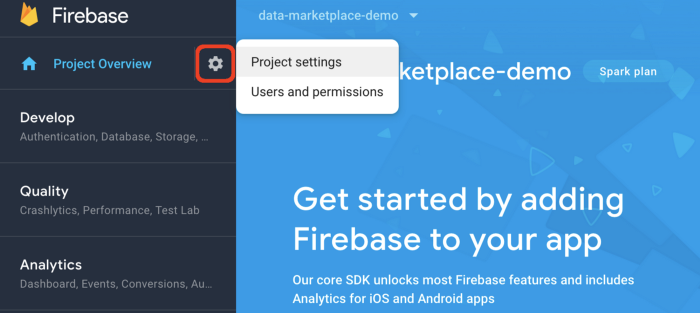
Once the project is created, you can proceed to the initial project page.
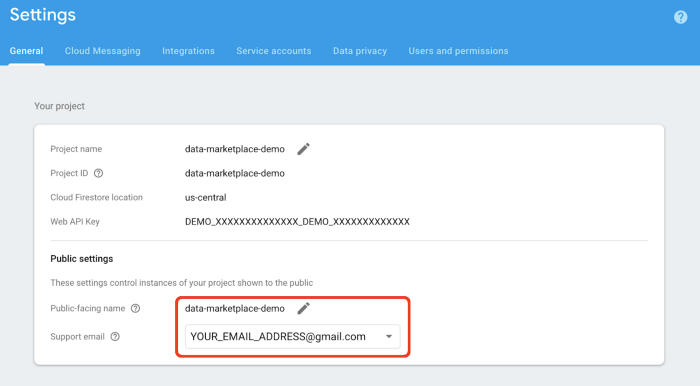
Click on the gear wheel icon and select “Project settings”.
Scroll down on the page to the “Public settings” section and specify the support email. You can select your gmail address from the dropdown.
Authentication settings
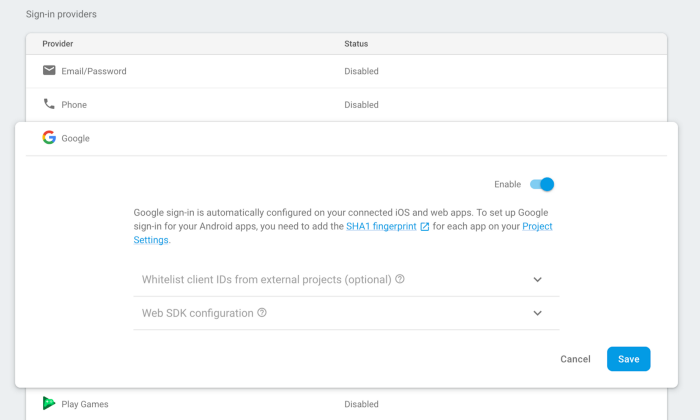
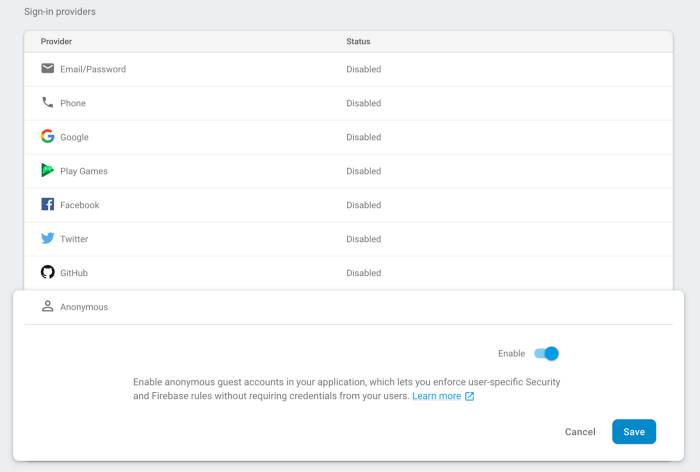
In the left-side menu select “Develop”, then “Authentication”. On the main page click on the “Set up sign-in method” button.

You will be presented with a list of available Sign-in providers. Please enable “Google” and “Anonymous”, as shown in the screenshots below. Activate the “Enable” switch and press “Save” to activate the selected provider.
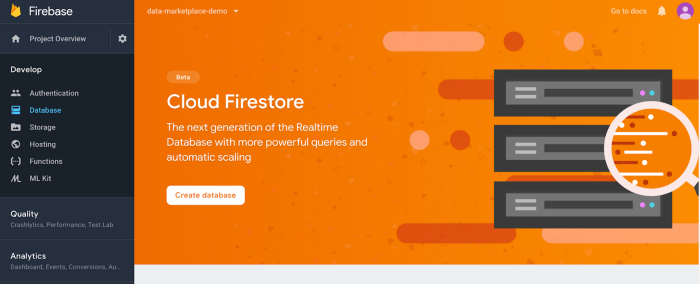
Database
In the left-side menu select “Develop”, then “Database”. On the main page click on the “Create database” button. If you are prompted to select between Cloud Firestore and Realtime Database, please select Cloud Firestore option.
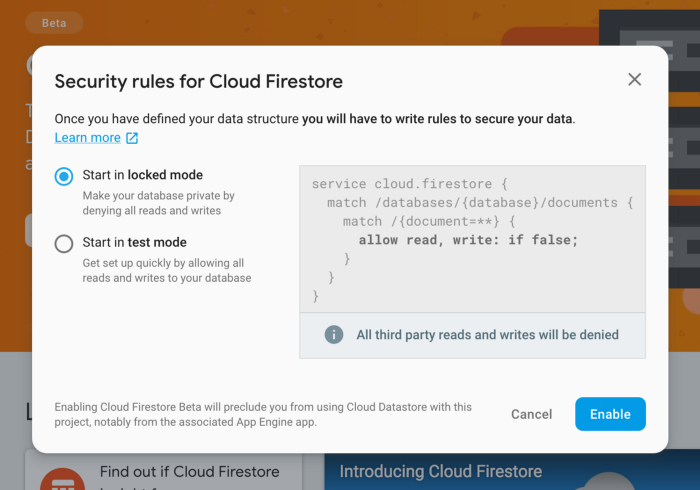
A pop-up window will appear asking to specify security rules. Please leave the first option “Start in locked mode” selected and press the “Enable” button.
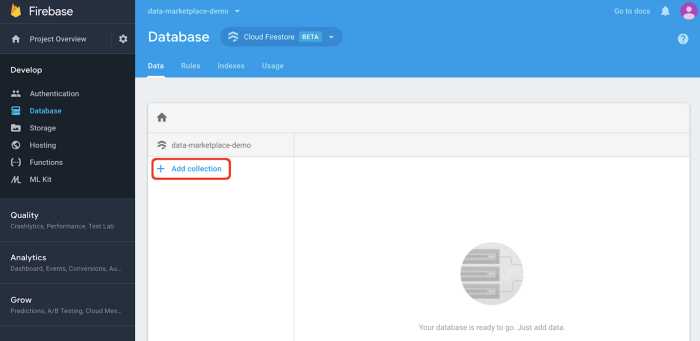
Once the database is configured, you will need to manually add some initial settings that are required by the Data Marketplace application.
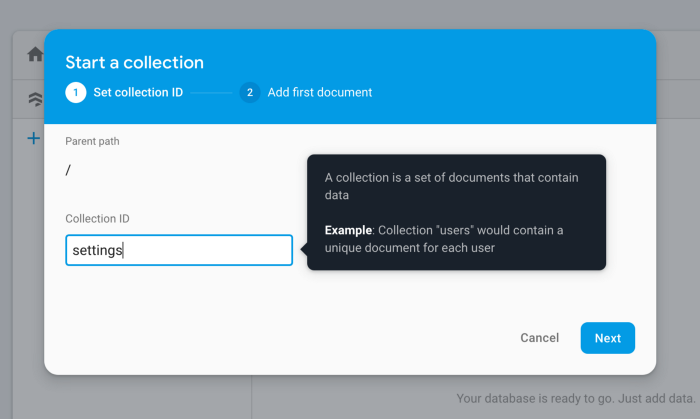
Click on the “+ Add collection” link, as marked in the screenshot below.
A pop-up window will appear. Please type in “settings” as Collection ID, then press “Next”.
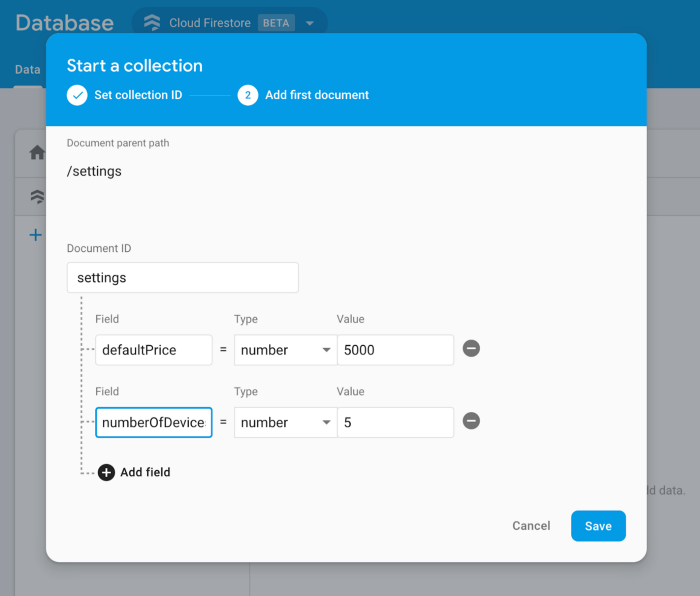
On the next screen please type in “settings” as Document ID, and specify Field, Type, and Value as shown in the table below. You can add new fields by pressing “+ Add field” link.
- Field name: defaultPrice. Type: number. Value: 5000
- Field name: iotaApiVersion. Type: number. Value: 1
- Field name: numberOfDevices. Type: number. Value: 5
- Field name: provider. Type: string. Value: https://nodes.devnet.iota.org
- Field name: tangleExplorer. Type: string. Value: https://devnet.thetangle.org/address
- Field name: wallet. Type: map
Once you specify the type of “wallet” as “map”, another field configuration will be displayed. Please specify Field, Type and Value as shown below:
- Field name: address. Type: string. Value: empty
- Field name: defaultBalance. Type: number. Value: 1000000
- Field name: seed. Type: string. Value: empty
- Field name: keyIndex. Type: number. Value: 0
You will need to define your real wallet address and seed if you want to enable purchase functionality. If you don’t have a wallet, please create one using IOTA Trinity Wallet, then fill it with tokens.
You can generate a new address from your wallet’s seed by running a NodeJS script with these commands:
const iota = require(‘@iota/core’);
const address = iota.generateAddress(seed, 0, 2, false);
Important: your wallet seed will not be accessible by the frontend application, it is only used internally.
You can modify, add and remove any of these settings at any time.
Once you are done with all fields, press “Save”.
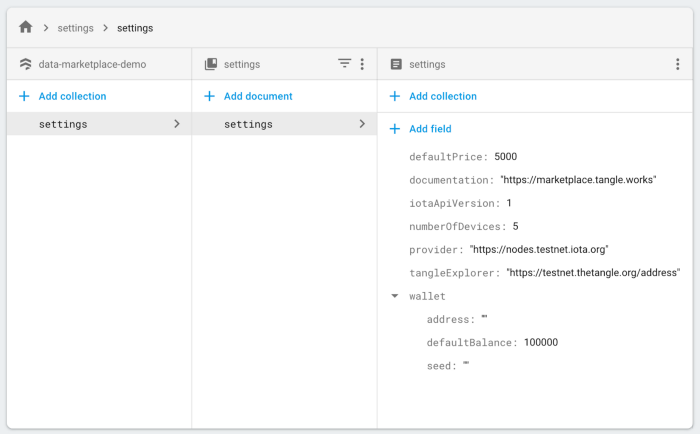
You should see the final settings as shown below. Please adjust your settings in case of any differences.
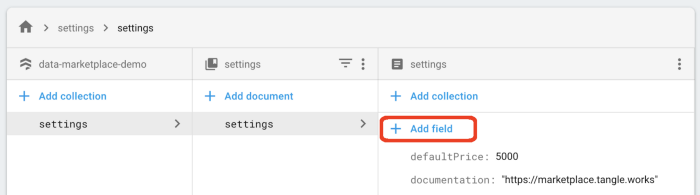
If you want to display a map, please sign up and create a new private access token as described here. Then create a new setting entry in your Firebase project with the name mapboxApiAccessToken and paste your access token there. You can create a new setting entry by pressing the “+ Add field” link at the top of the settings list
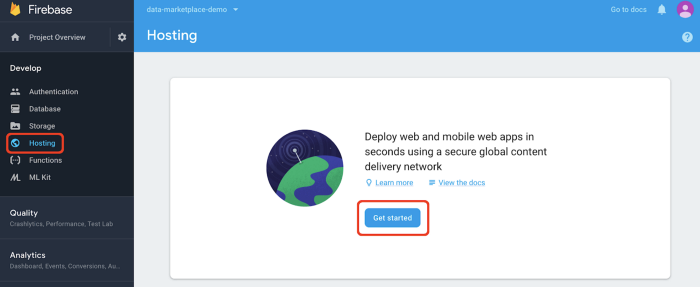
Hosting
Last but not least the hosting configuration.
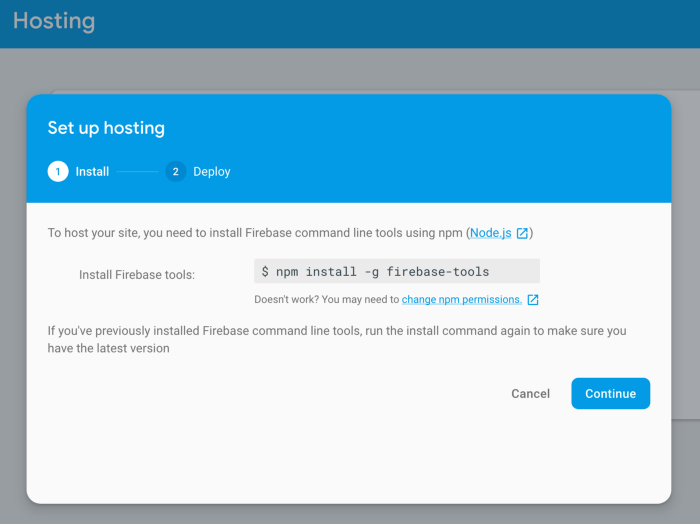
In the left-side menu select “Develop”, then “Hosting”. On the main page click on the “Get started” button.
A pop-up window will appear. No need to select anything, just press the “Continue” or “Next” button, depending on the current version.
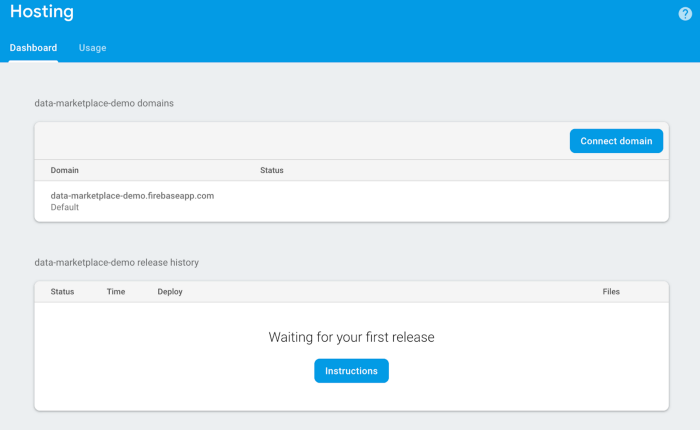
Once done, the hosting main page is displayed. Here you can manage versions and connect a custom domain.
That is it for today.
In the next article, we will learn how to deploy your application.
Part 1: IOTA Data Marketplace — Update
Part 3: Publishing Sensor Data
Part 4: Cloud Backend Configuration
Follow us on our official channels for the latest updates:
Discord | Twitter | LinkedIn | Instagram | YouTube