The IOTA Data Marketplace: A Technical Introduction
https://data.iota.org

In the previous article in this series, we talked about cloud backend configuration. Today we will learn how to checkout, build and deploy your version of the Data Marketplace application.
Please check this page to see how to install Node.js
You need to install Firebase CLI in order to deploy your application to Firebase.
TheFirebase CLI(GitHub) provides a variety of tools for managing, viewing, and deploying to Firebase projects.
Once you’ve installed Node.js, you can install the Firebase CLI using npm (the Node Package Manager) by running the following command:
npm install -g firebase-toolsYou should now have a globally available firebase command available from any terminal window on your machine.
Once you’ve installed the Firebase CLI, sign in using your Google account:
firebase loginThis command connects your local machine to your Firebase account and grants access to your projects.
To test that authentication worked, you can run a firebase list to see a list of all of your Firebase projects.
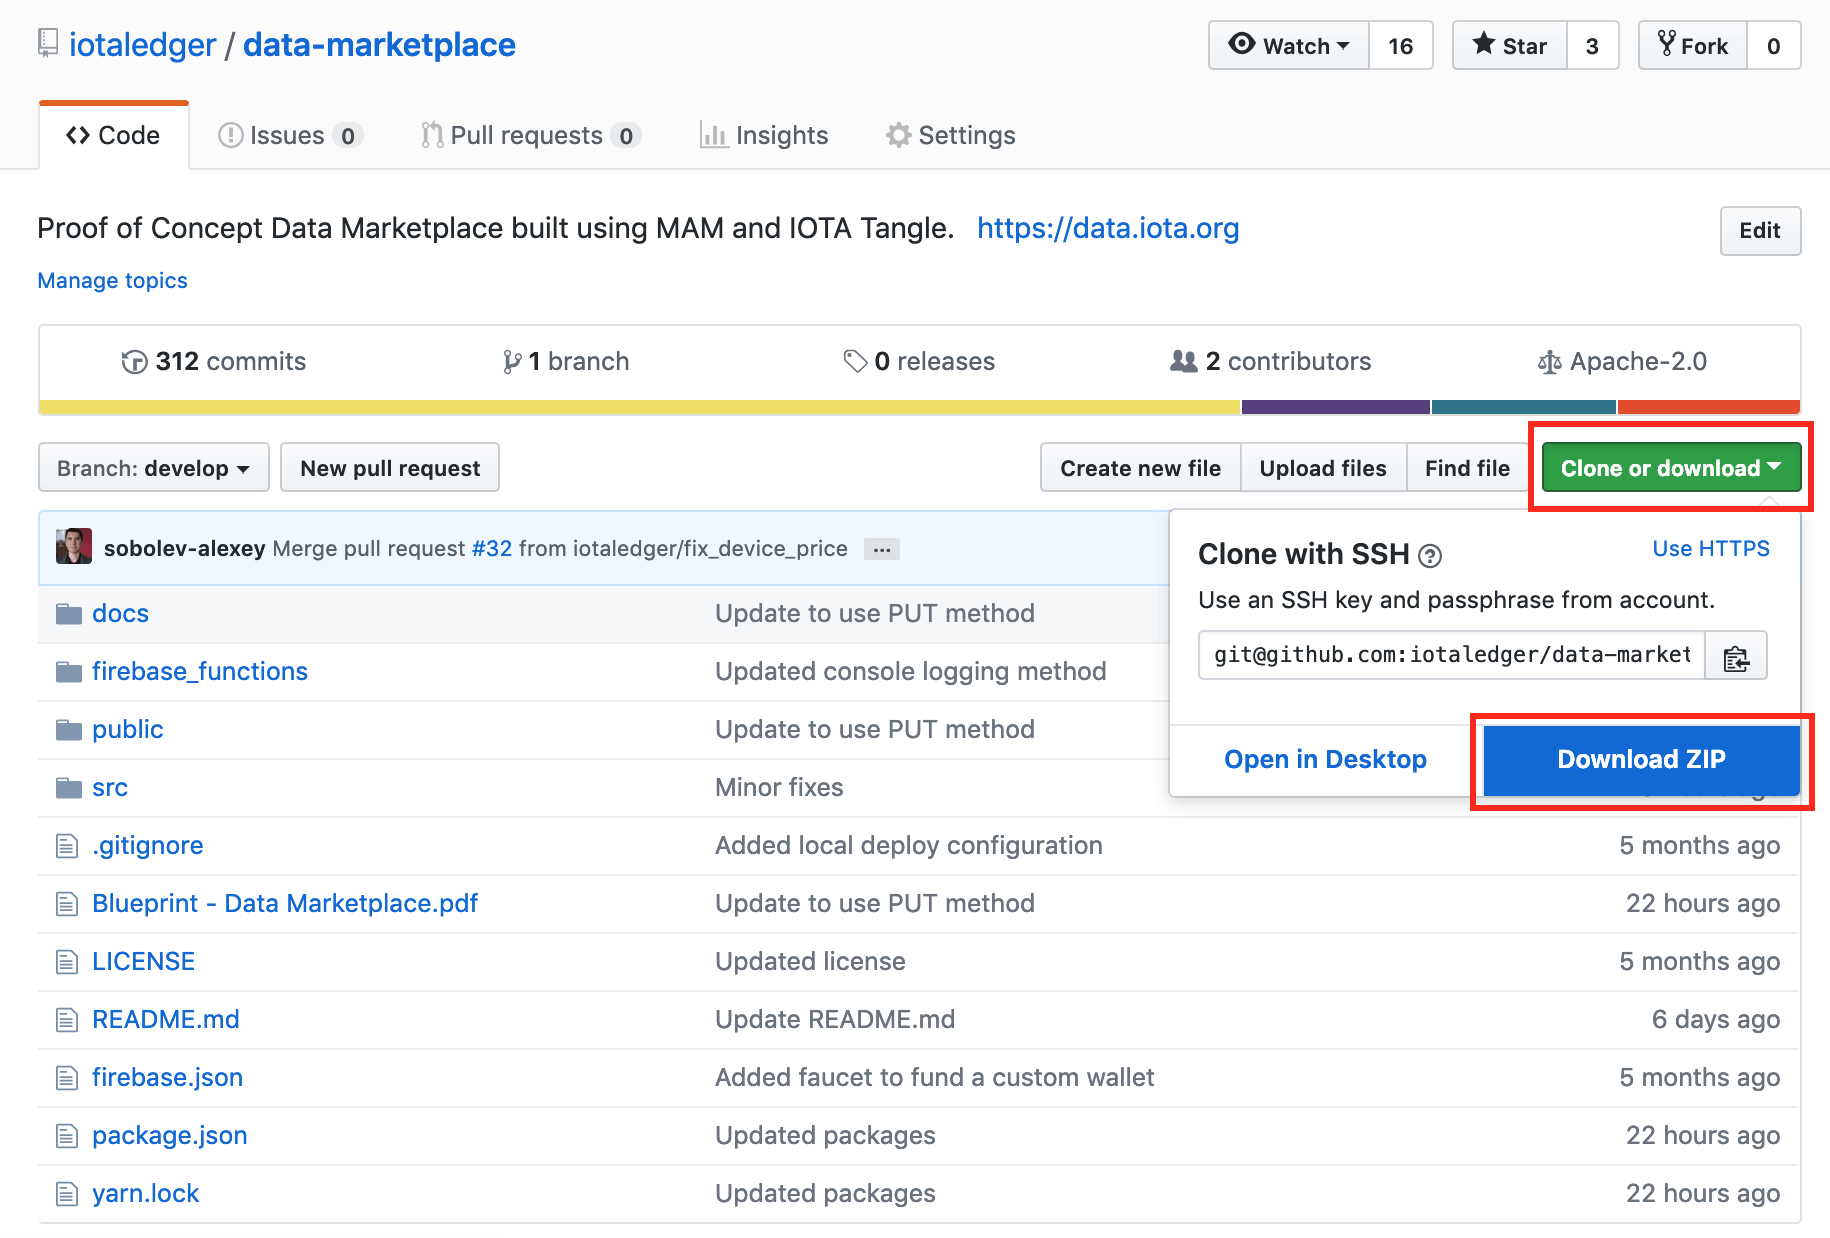
Check out the latest version of the Data Marketplace in a folder on your machine.
If you are familiar with Git, you can clone the repository by running the following command inside a folder, where you want this project to reside.
git clone [email protected]:iotaledger/data-marketplace.gitAlternatively, you can go to the open-sourced project page and download the latest release as shown in the screenshot below:
After you cloned or downloaded and unzipped the project, you need to install the required packages. Please open a Terminal/Console application, navigate to the folder with the project source code and run the following command:
npm run install-allThis operation can take several minutes, please do not interrupt it.
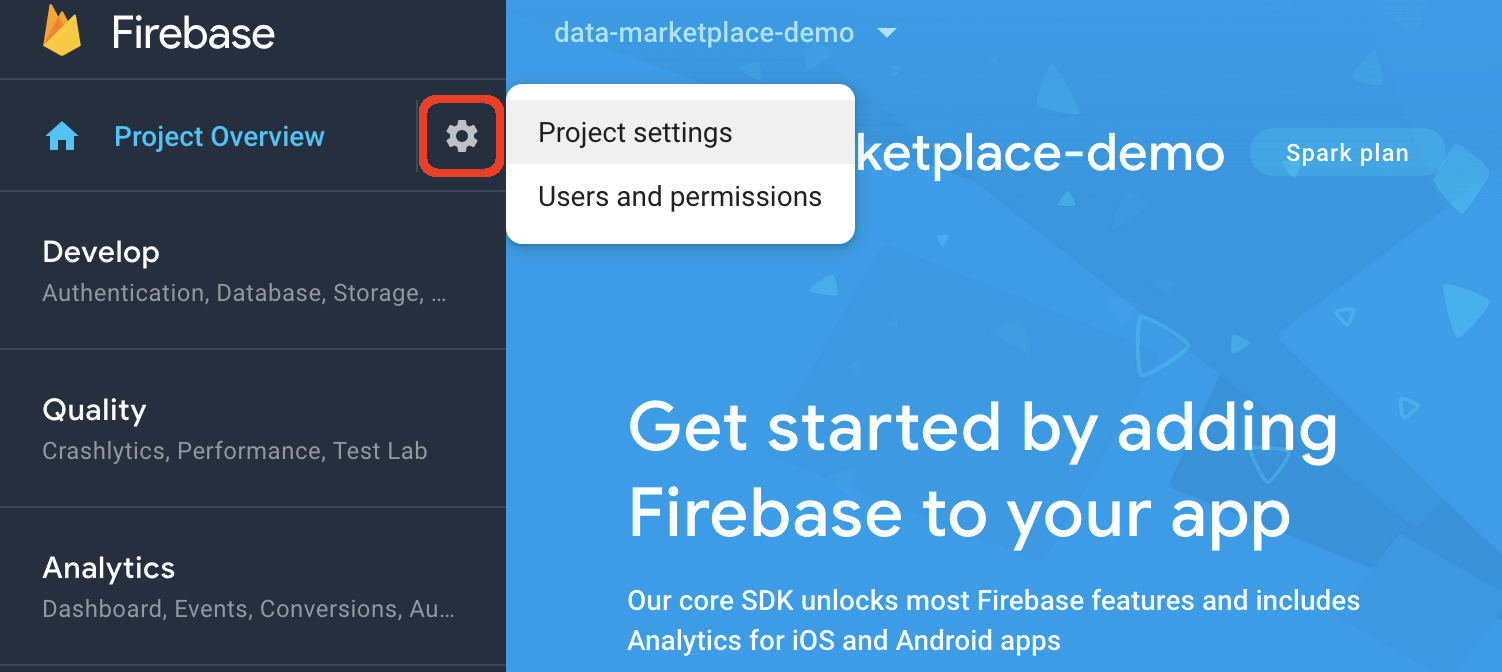
Proceed to https://console.firebase.google.com and select your project.
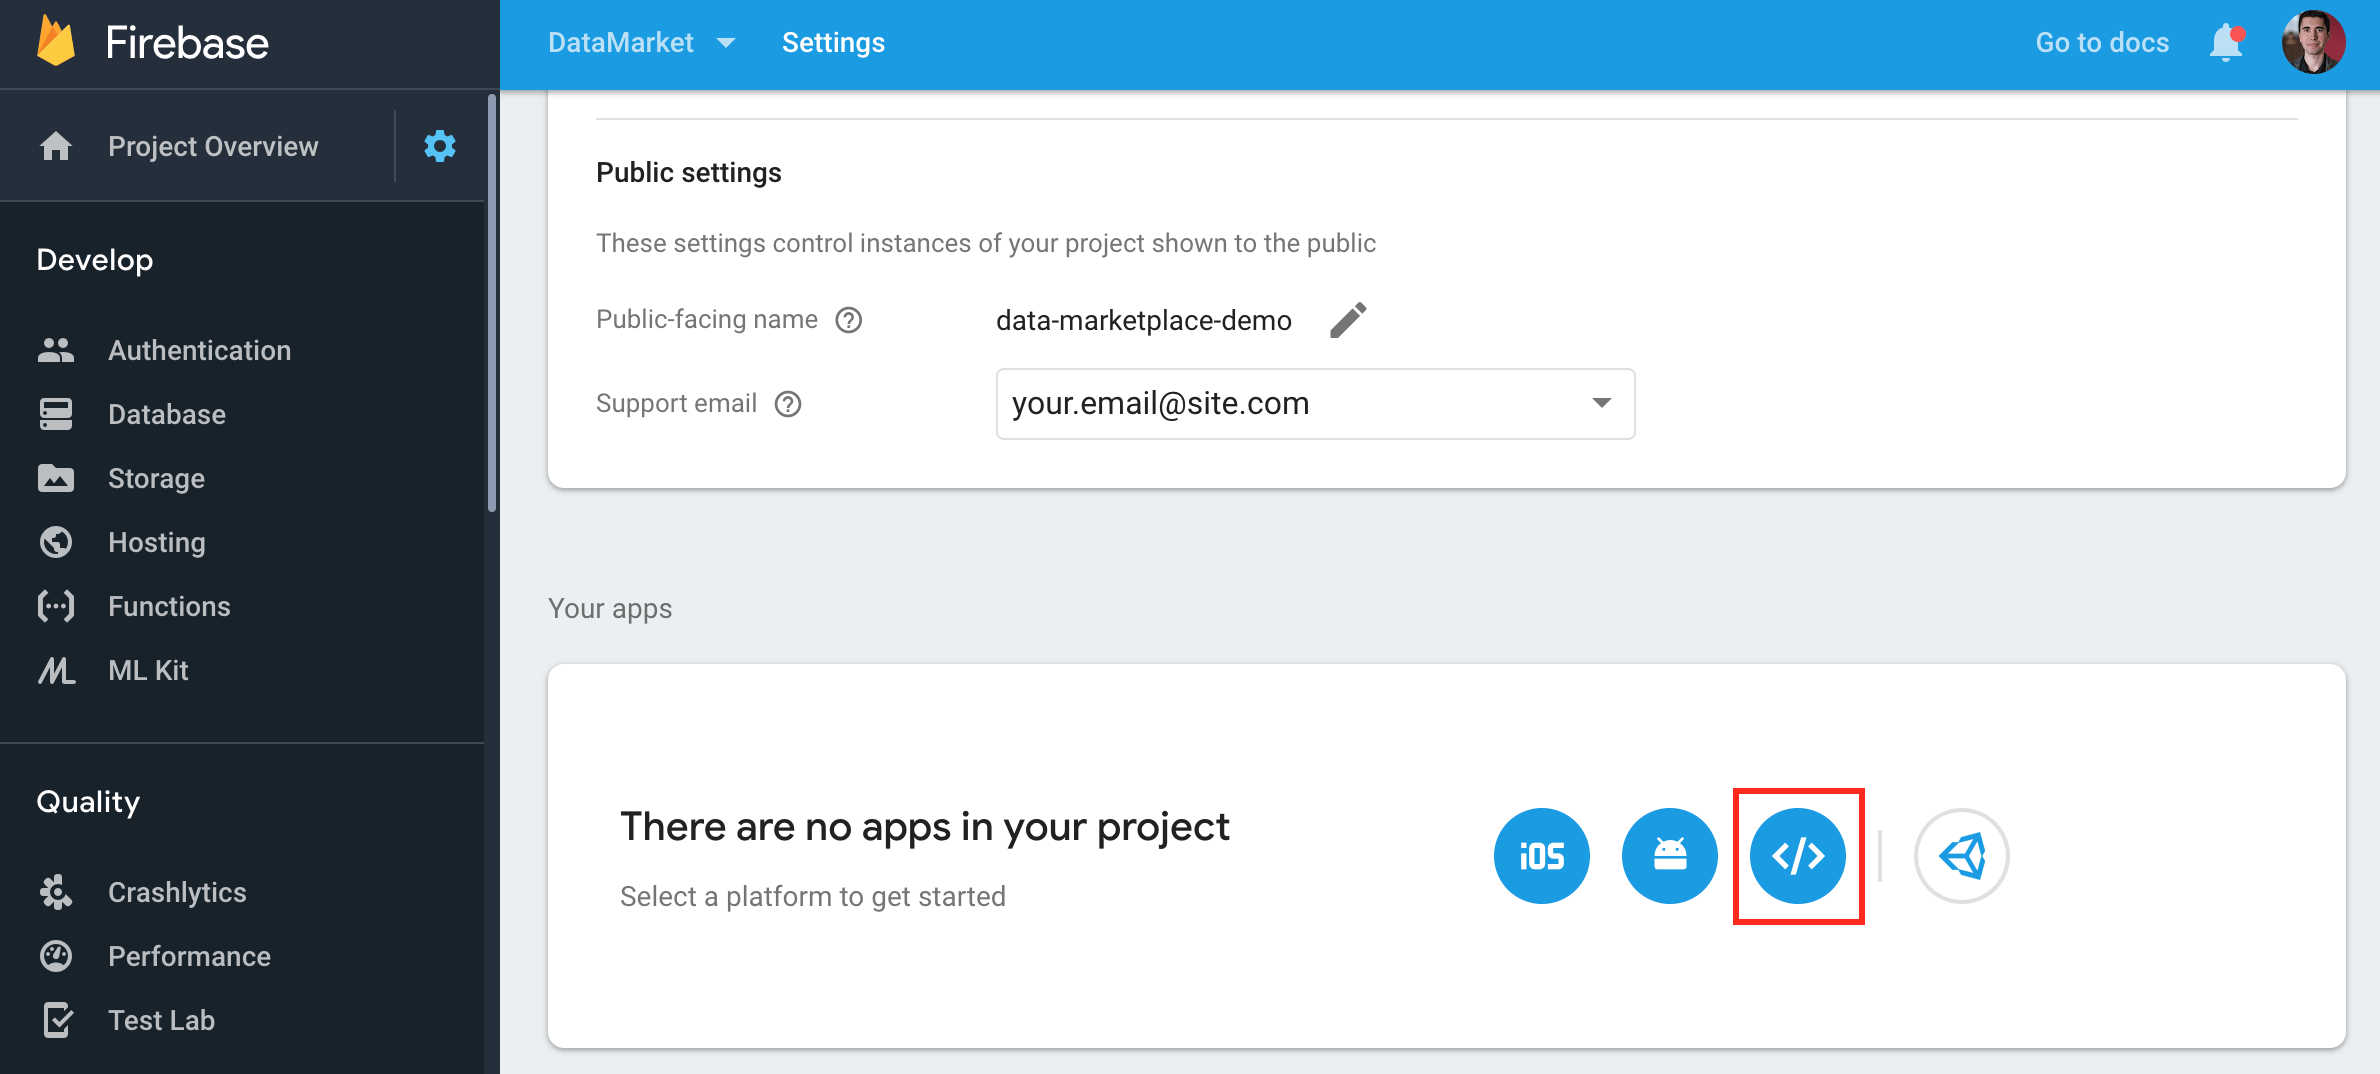
Click on the gear wheel icon and select “Project settings”.
Scroll down on the page to the “Your apps” section. Click on the circle with “</>” (marked with a red border on the screenshot below) to display the project configuration.
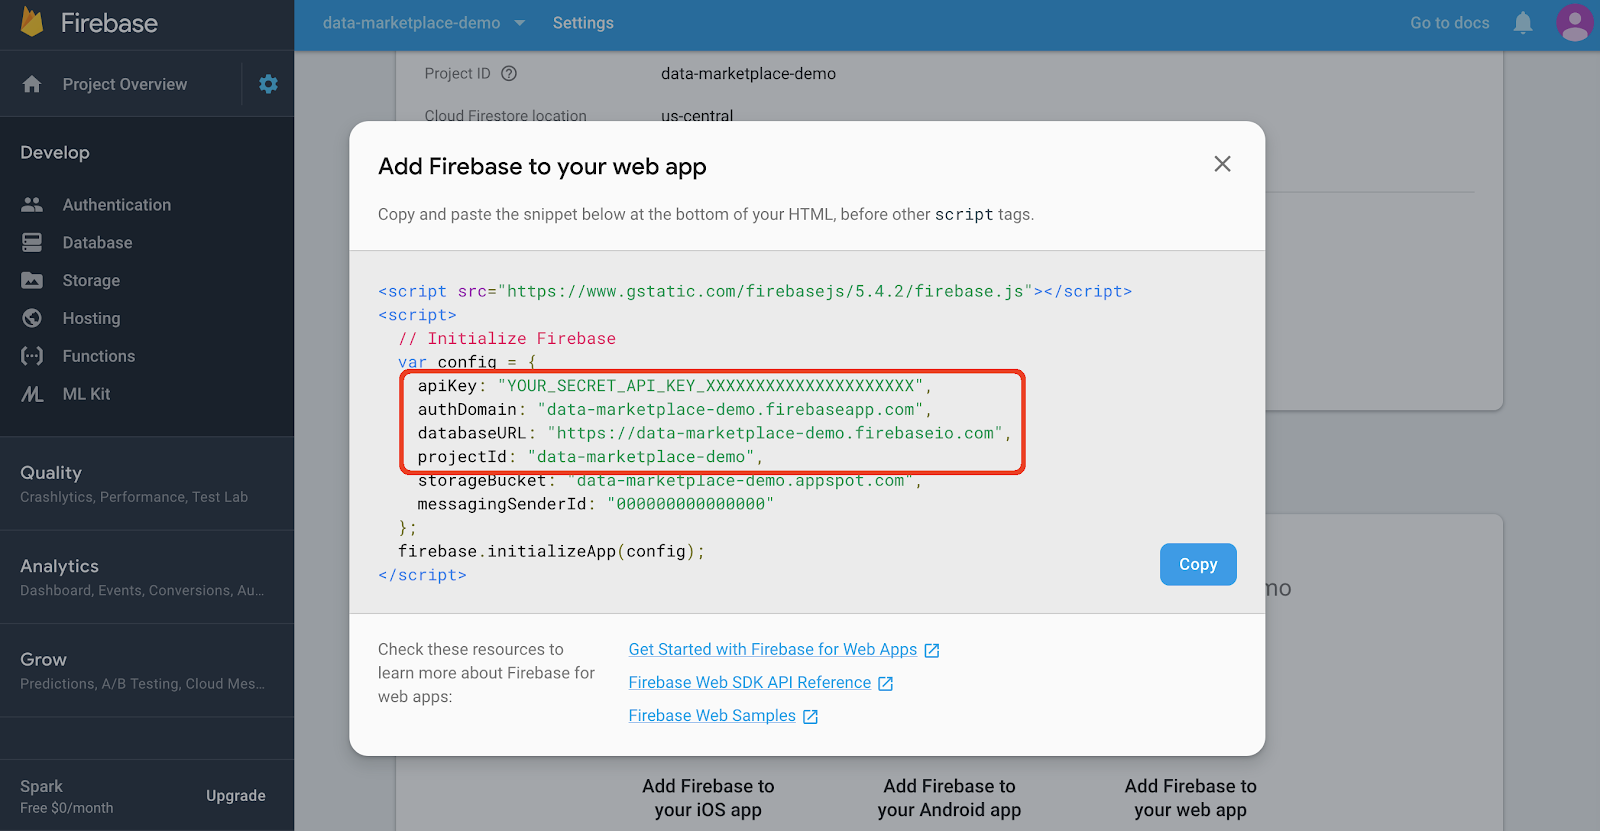
Please consider the four lines of the project configuration as shown in the screenshot below. You’ll need it to connect your app with the backend.
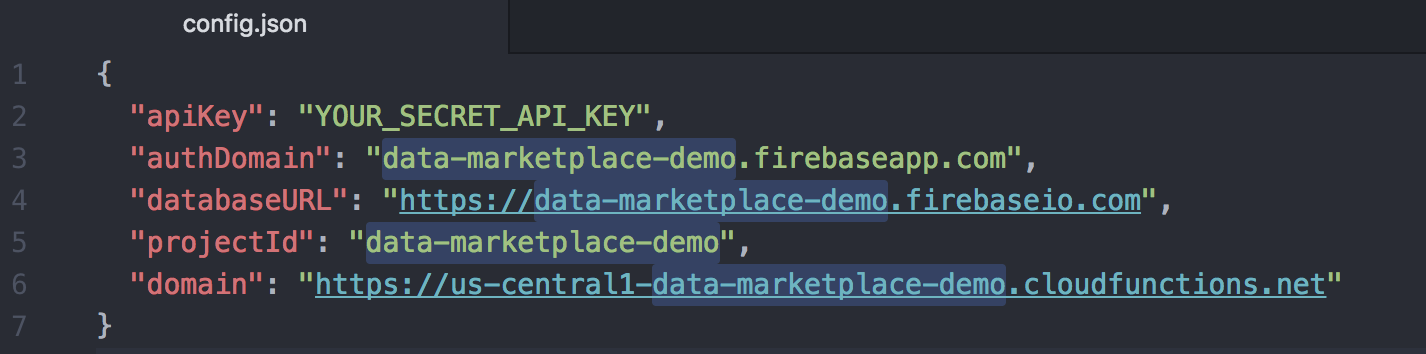
Open the project folder, find a file named “config.json.example” in the “src” folder and rename it to “config.json”.
Open the “config.json” and replace values for apiKey, authDomain, databaseURL, and projectId with values that you retrieved from Firebase.
For the last parameter, domain, please replace only the placeholderXXXXXXXXXXXXXXXXX with the value of projectId. So your final config file should look as the one shown below (with your valid api key and unique project ID)
To deploy the application to firebase, you will need to have your project ID one more time.
Run the following command:
npm run deploy YOUR_PROJECT_IDPlease replace YOUR_PROJECT_ID with the real ID of your project.
In my example the command will look like npm run deploy data-marketplace-demo.
This operation can take several minutes, please do not interrupt it.
Once it is ready, you can start using your application.
Proceed to the https://YOUR_PROJECT_ID.firebaseapp.com to see it in action.
Please replace YOUR_PROJECT_ID with the real ID of your project.
In my example, the URL will look like https://data-marketplace-demo.firebaseapp.com
Some functions of the application can run longer than the default allowed runtime of 60 sec. If the function is interrupted, the operation can not be successfully completed and might result in data inconsistency. Therefore I suggest adjusting function runtimes to prevent this from happening. This can be done in a few steps:
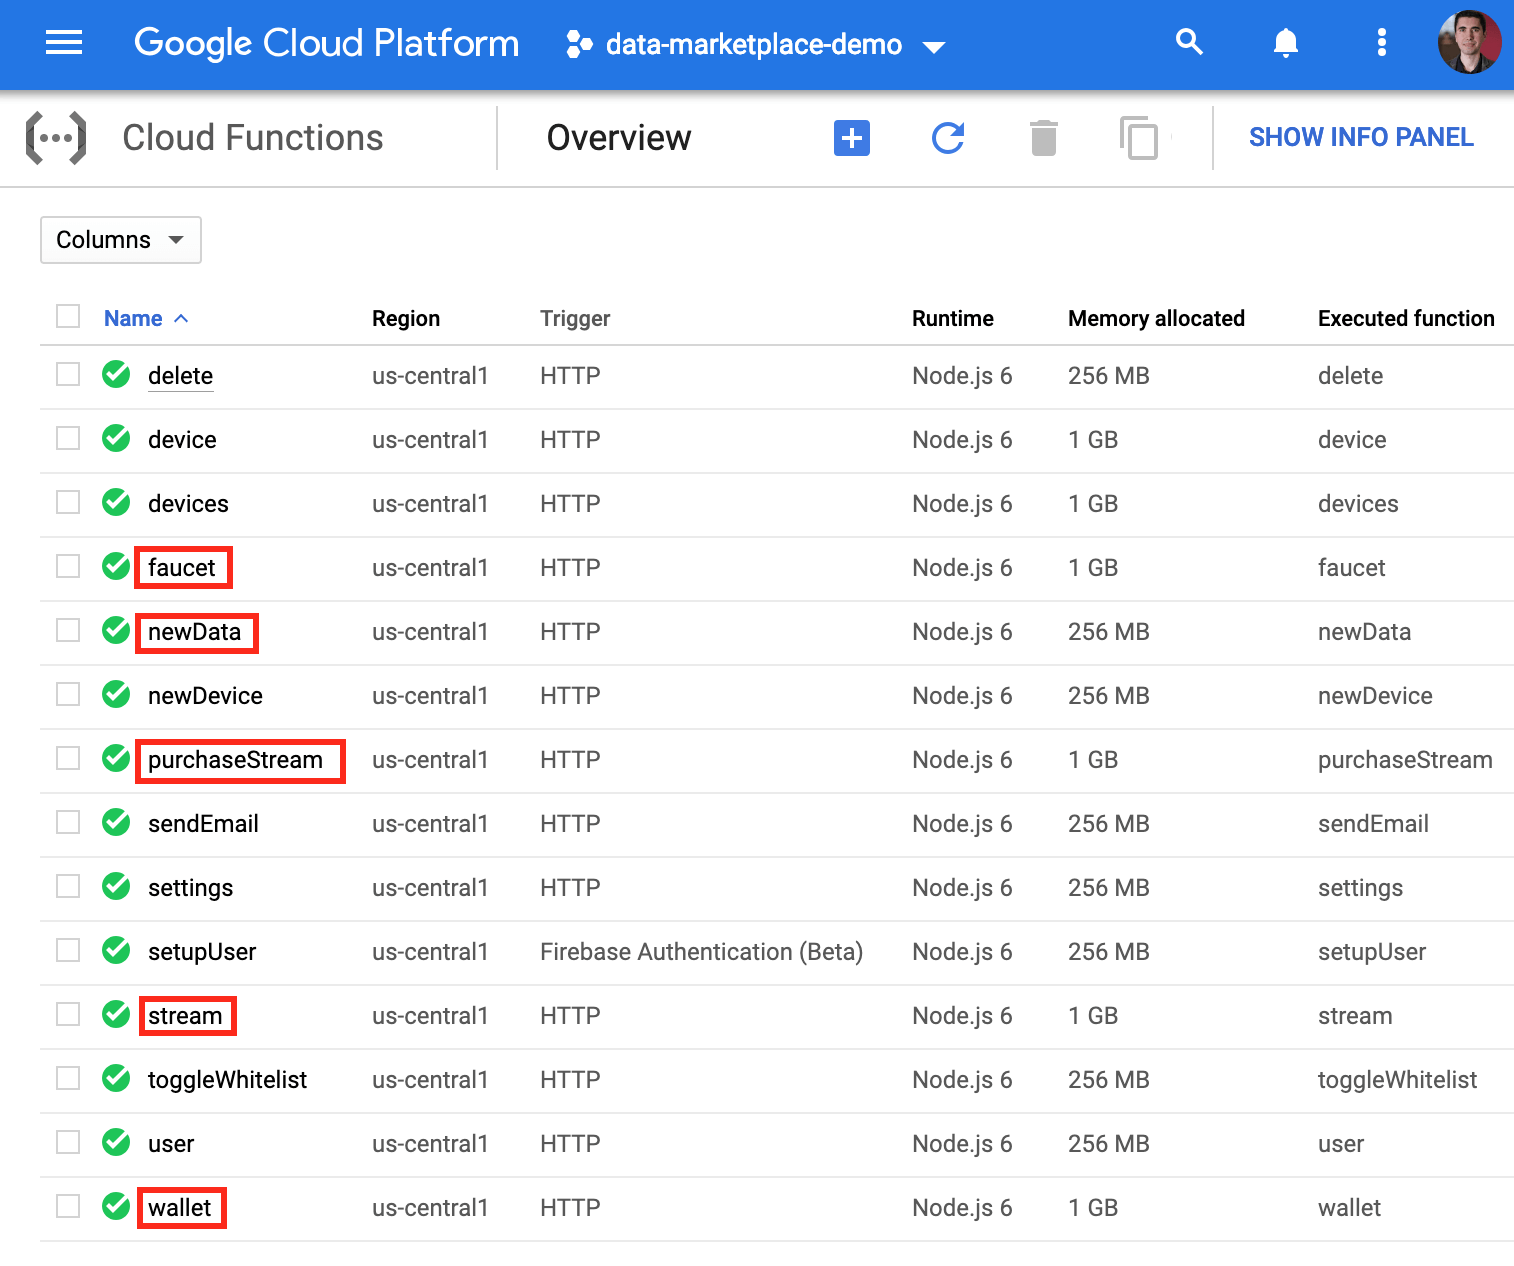
- Open https://console.cloud.google.com/functions/list, from the dropdown menu on the very top of the page select your project.

2. You will be presented with a list of functions. Please follow steps 3–7 for every of these functions: faucet, new Data, purchaseStream, stream, wallet
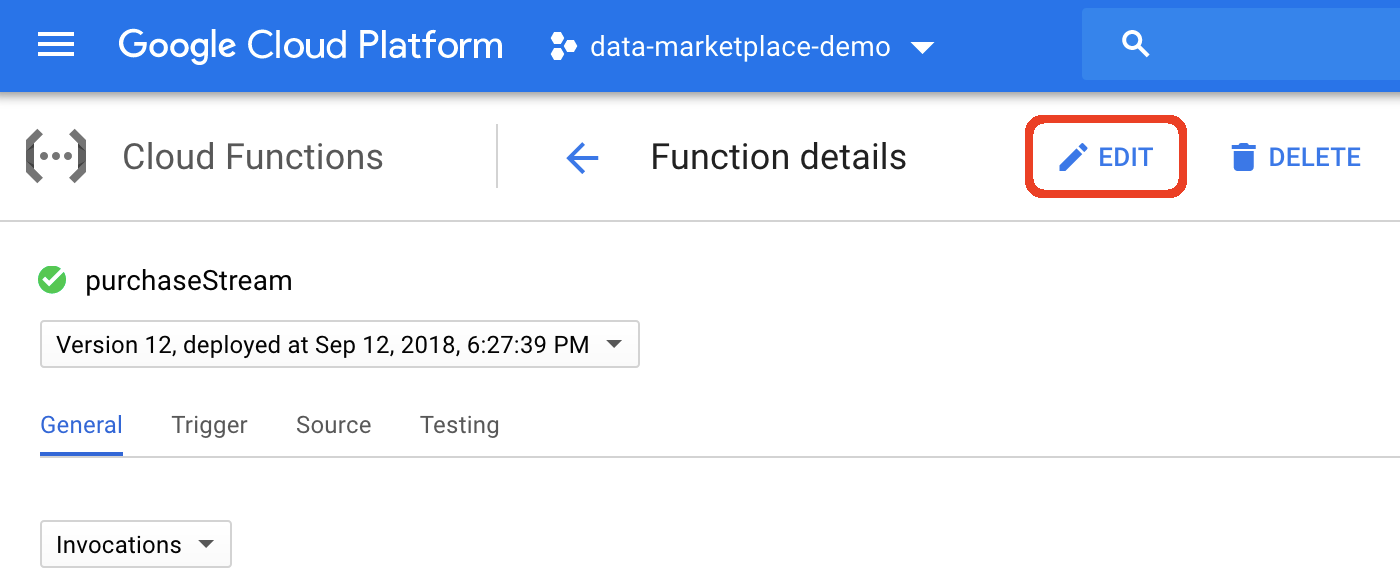
3. Click on the function name, and you will be redirected to a function details page. Click on the Edit button
4. On the Edit screen scroll to the very bottom of the page, then click More
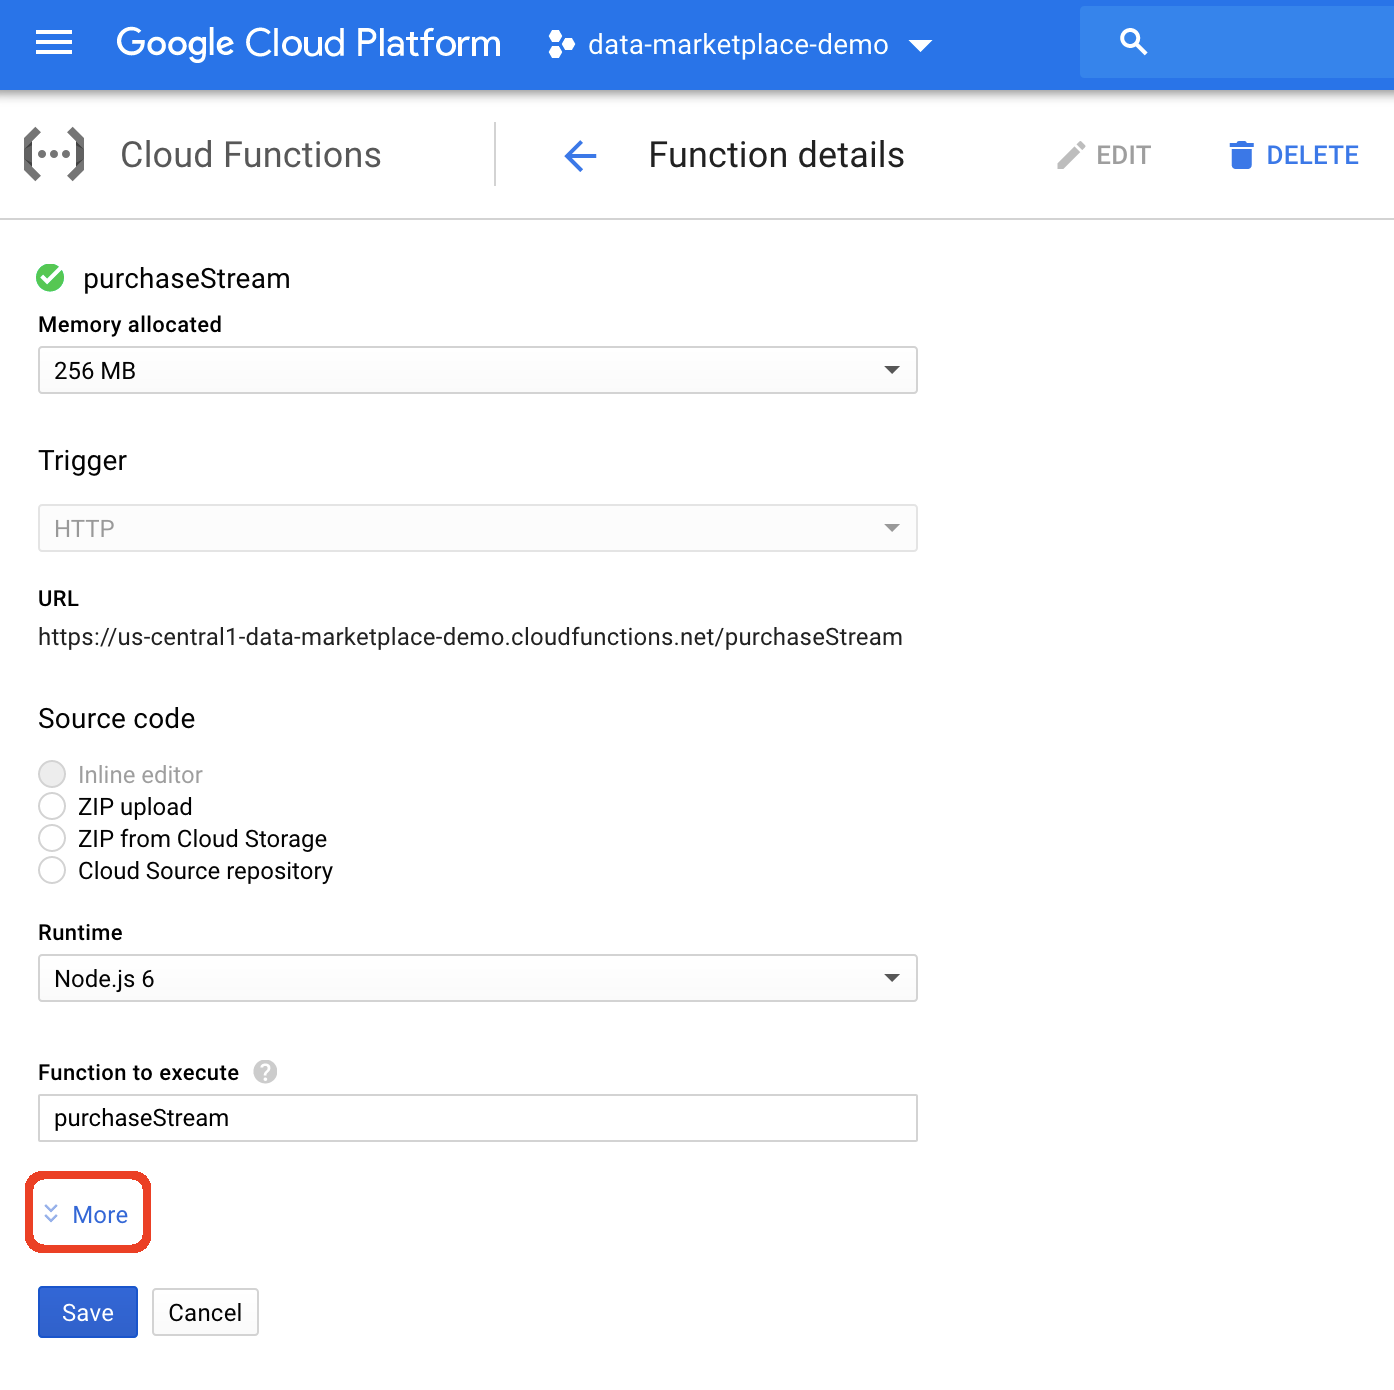
5. In the Advanced options adjust the Timeout value. I recommend to set a value between 360 and 540 seconds. PressSavebutton on the very bottom.

6. Wait until the function is updated. A blue spinner will indicate the progress.
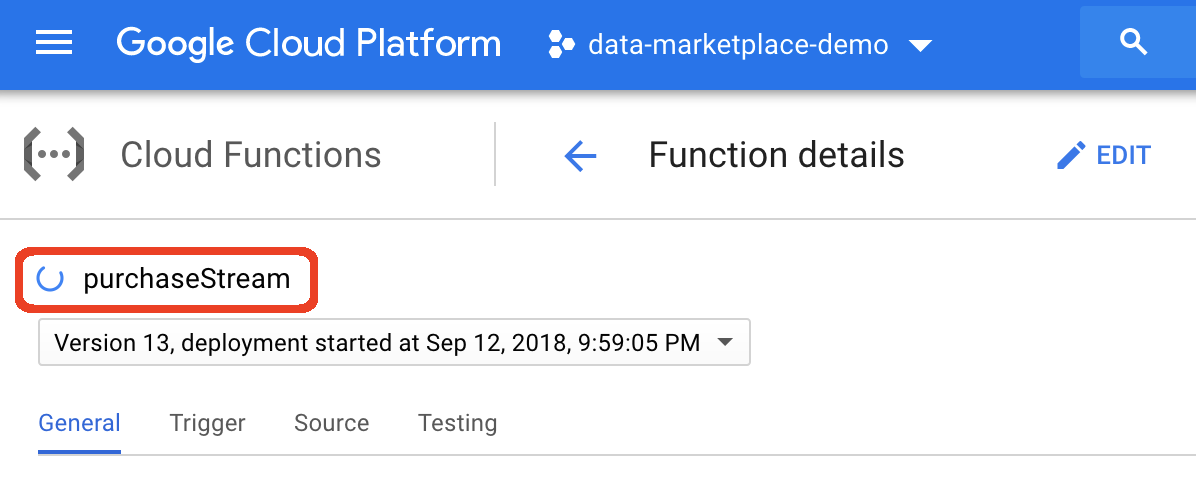
7. Once the function is updated, return to the functions list by pressing theCloud Functionsbutton, and proceed with the next function.

Some of our community members who tried to run their own versions of the Firebase backend have reported that on the free Spark billing plan Firebase restricts the usage of Firebase Functions.
To fix this please change the billing plan to Blaze to see if it solves the issue. The Blaze is the “pay as you go” plan, so if backend usage remains within certain limits, your account won’t be charged. This plan removes the limits for function runtime duration, which will enable functions to run successfully.

Part 1: IOTA Data Marketplace — Update
Part 3: Publishing Sensor Data
Part 4: Cloud Backend Configuration
Part 5: Checkout and Deploy
Follow us on our official channels for the latest updates:
Discord | Twitter | LinkedIn | Instagram | YouTube